
Plex is a popular and incredible home media player that can be used to watch your home media. It features apps for Windows, Android, iOS and even web based media playback.
With appropriate communications, this media can be streamed from anywhere on earth! Plex can functionally act like a subscription to Netflix, Hulu and countless other services. If, of course, you have the media!
This is our guide on how to install Plex on a Debian 11 container using a lightweight Proxmox LXC.
Decide On Privileged Vs. Unprivileged Proxmox Containers
One of the first decisions you will need to make is whether you are making a privileged or unprivileged container in Proxmox.
If you want to mount external media, such as through an SMB share to your NAS, you will need to select a privileged container.
If you intend to host your media directly within the container itself, you can run Plex as an unprivileged LXC.
Should you want flexibility, choose a privileged LXC. While you can switch between these two options, it requires a full backup and restore of your Proxmox container. This can be tedious, especially if the container features your actual media, which can be quite sizable.
Create Your Promox LXC For Plex Media Server
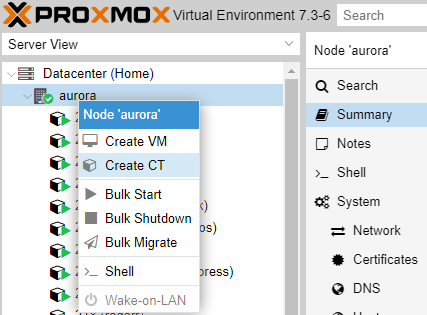
The first step is to create the LXC for Plex. With Proxmox in server view, right click your server and choose Create CT to create a container.
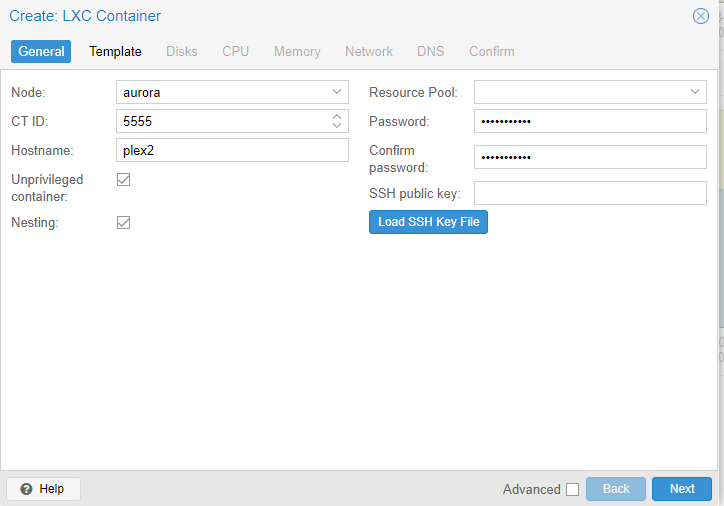
In the general tab, assign your ID, hostname and password. Be sure to enable or disable “Unprivileged container” here, based on the above recommendations. Click next.
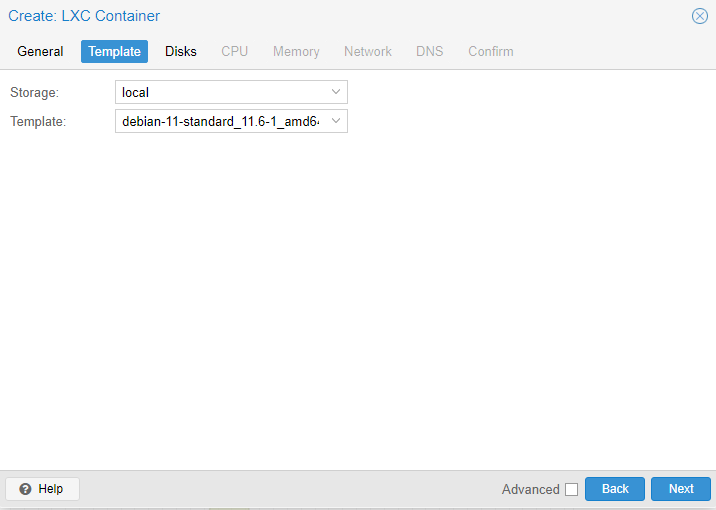
For the template, choose your Debian 11 image. If you do not have an appropriate operating system template for Debian 11 and need to know how to add these templates, click here.
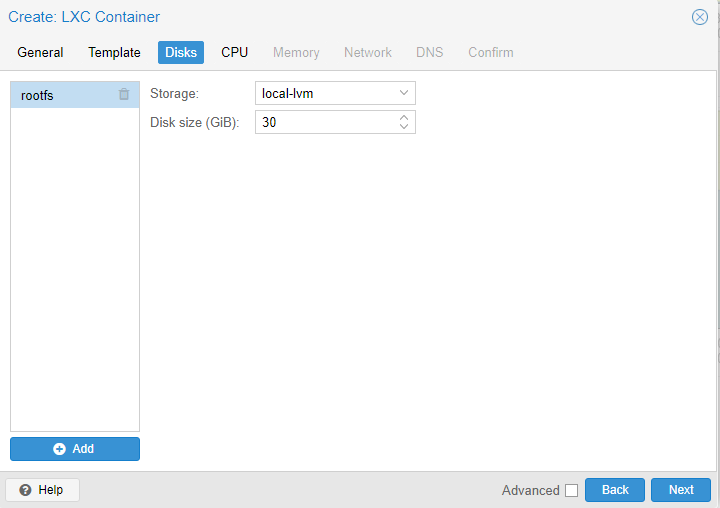
On the disks page, select your preferred storage device and disk size. Plex doesn’t need a ton of space.
If you want to mount media to your Plex server, add this as a second drive to the system. The operating system (Plex) should be on a fast disk, whereas your media can be on a slower, spinning disk.
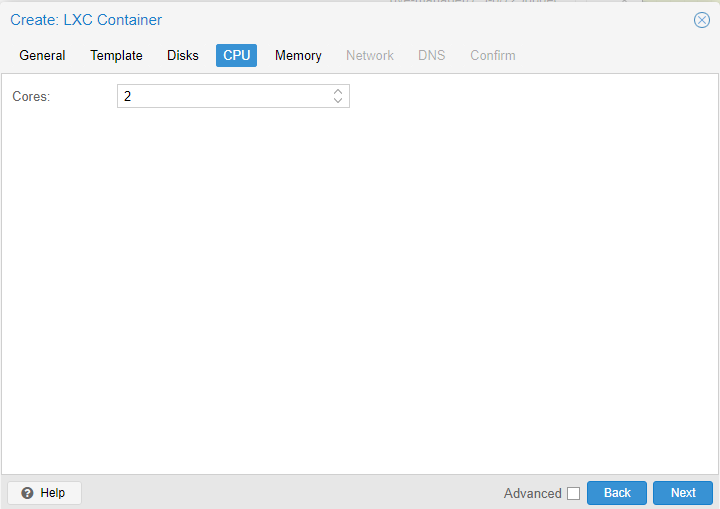
For CPU’s, you can initially select 1 or 2. You may want to increase this later, if you want to get into CPU transcoding. For most basic systems, 1 or 2 CPU’s will be adequate.
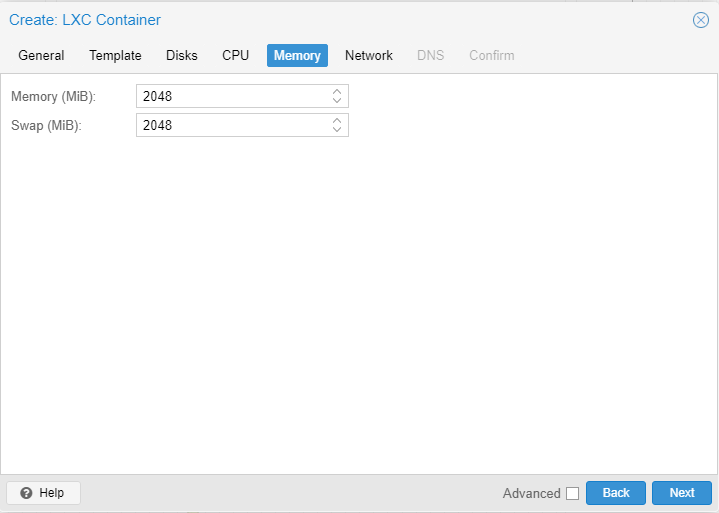
For memory, a good target is generally between 1 to 2 gigabytes of RAM. Most systems will only need 1 gig, larger installations may require 2 gigabytes.
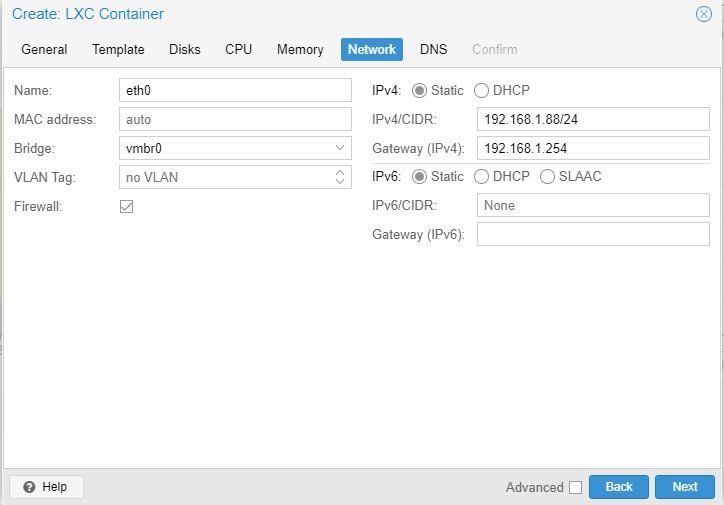
For network settings, a static IP is recommended. This will be especially important if you want to provide remote access to your server later. Assign the server an IP on the appropriate network.
If you have advanced network configurations, my may need to change the bridge adapter and/or VLAN tag. These should be set to the appropriate VLAN tag and/or bridge interface you need. Most installations will not need an IPv6 configuration, unless you want to use that.
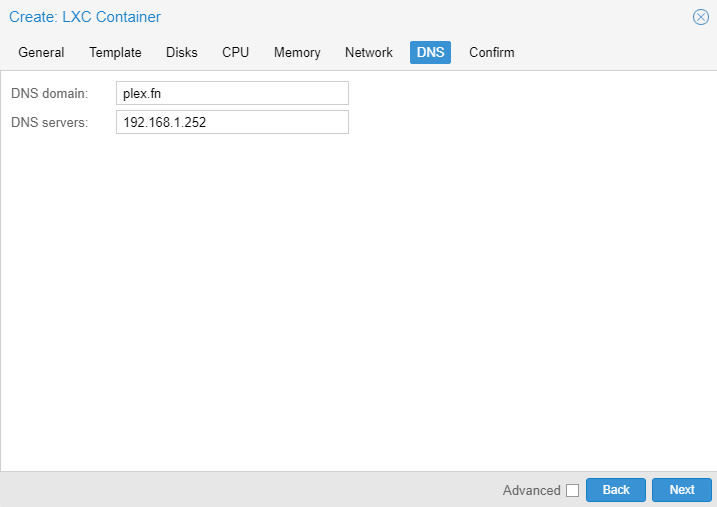
For DNS, the minimum you will need here is your DNS server. This may be the IP address of your router, but could be different if you run separate DNS like PiHole. A DNS domain is optional, but is helpful if you run more enhanced DNS.
In the confirm page, make sure you have all your settings correct. If it all looks good, create the container. You can also go back, if needed, to adjust any settings that you need.
Your container will now be created.
Boot Your Container & Perform Initial Server Setup
From here, boot your container and perform any typical server management you might normally need to apply.
Examples of common initial configurations include:
- Updating the software
- Creating other user accounts
- Enabling root SSH access or SSH key sharing
- Installing monitoring software or other standard software packages
What this part looks like will generally depend on your overall experience levels with Linux and best practices you’ve picked up along the way. None of it is absolutely necessary to move forward with things.
If your initial server setup involves installing a firewall, your Plex installation will need to allow traffic over the following ports:
- TCP/32400 (Default Plex media port, can be changed)
- TCP/22 (SSH)
- Possibly others, depending on needs
Install Plex On Debian 11
The first step will be to update your software and packages:
apt update && apt upgrade -y
From here, you need to install a couple initial pre-requisite packages:
apt install apt-transport-https curl gnupg2 sudo -y
You’ll need to add the Plex server keys to your system:
curl https://downloads.plex.tv/plex-keys/PlexSign.key | sudo apt-key add -
Then, add the Plex repository to your system:
echo deb https://downloads.plex.tv/repo/deb public main | sudo tee /etc/apt/sources.list.d/plexmediaserver.list
Update your packages, so your system knows about the Plex packages:
apt update
Next, install the Plex Media Server:
apt install plexmediaserver
Verify & Enable Plex Media Server
Once you’ve installed everything, the next step is to verify the installation and enable the server. This will ensure it starts every time your server starts.
First, make sure that Plex is installed:
systemctl status plexmediaserver
You should see something like this:
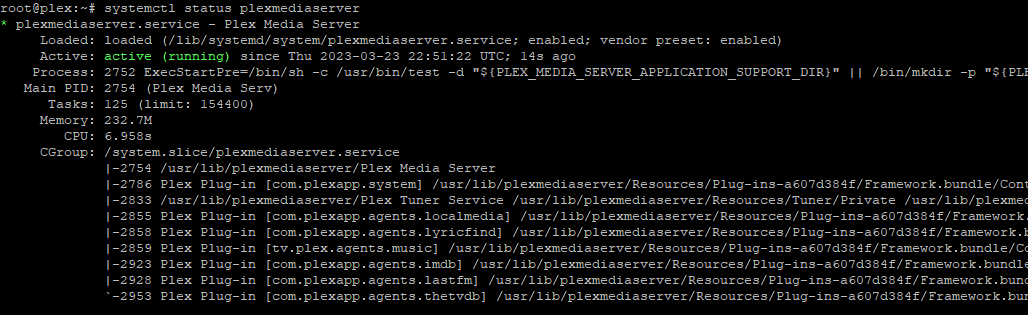
Then, enable the server so it will start on boot, and go ahead and start your Plex Media server:
systemctl enable plexmediaserver
systemctl start plexmediaserver
Set Up SSH Tunnel From Client To Plex Server
The default installation of Plex assumes you are installing this on a machine that you have direct web access to. (In technical terms, via loopback.) This is not the case when you are installing Plex into a “headless server” kind of operation like we are here.
To perform the initial Plex setup, we have to tunnel a port over SSH from our client machine to our server.
Many SSH clients will allow this tunneling. In our example, we are going to show you how to do this over Putty.
With your SSH tunnel open to your server, right click Putty’s application bar and choose Change Settings.
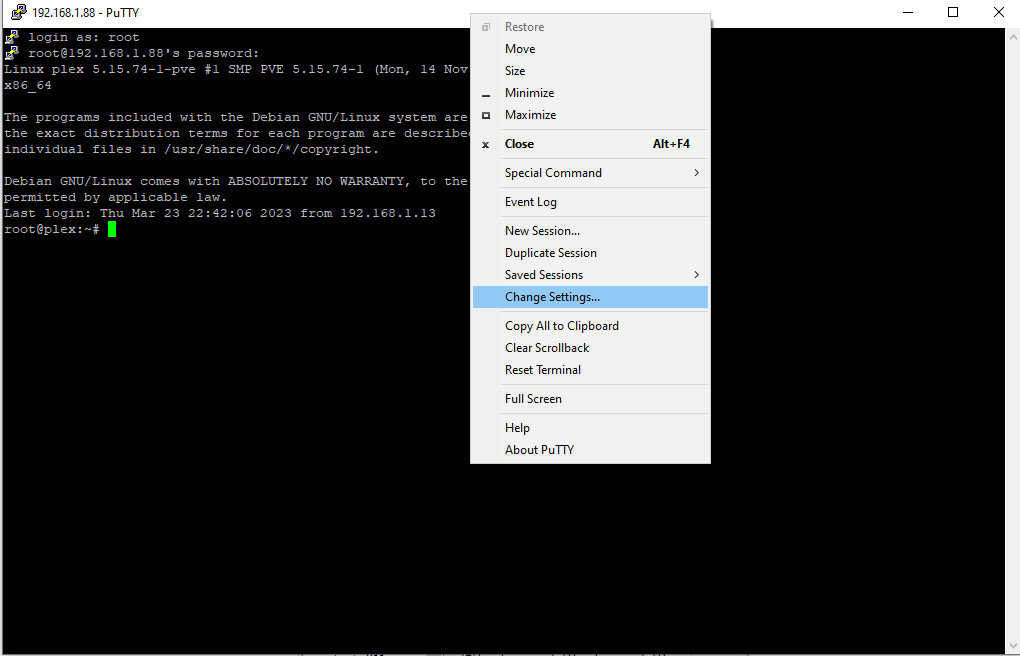
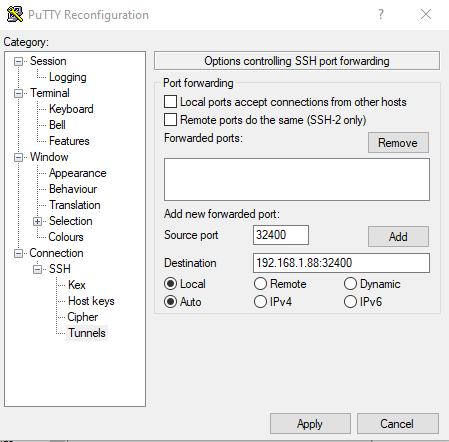
In the settings on the left hand side, navigate to Connection -> SSH -> Tunnels.
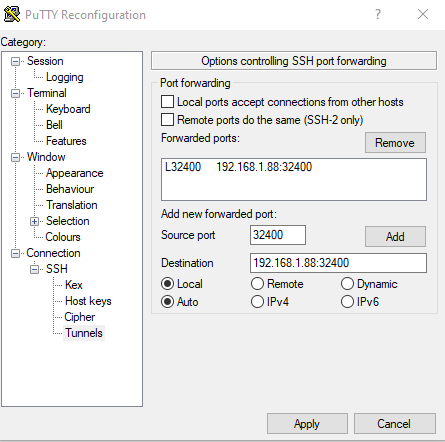
For the “source port” put 32400. In the destination field, you need to put “serverip:32400”. In our example, our Plex server was assigned 192.168.1.88. No other settings were adjusted, but your can review mine. Click “Add” once you have this.
Your Putty tunnel configuration should now look like this. If it does, click Apply in the bottom right. This will establish an SSH tunnel to your server.
You will now be able to access the web page of your Plex server from the machine that is running Putty. The Plex server will be generally available once you go through the setup.
Set Up Your Plex Server Via The Web
With your SSH tunnel established, open your favorite browser and go to the following address.
http://127.0.0.1:32400/web
If all is well, you should be greeted by a screen like this: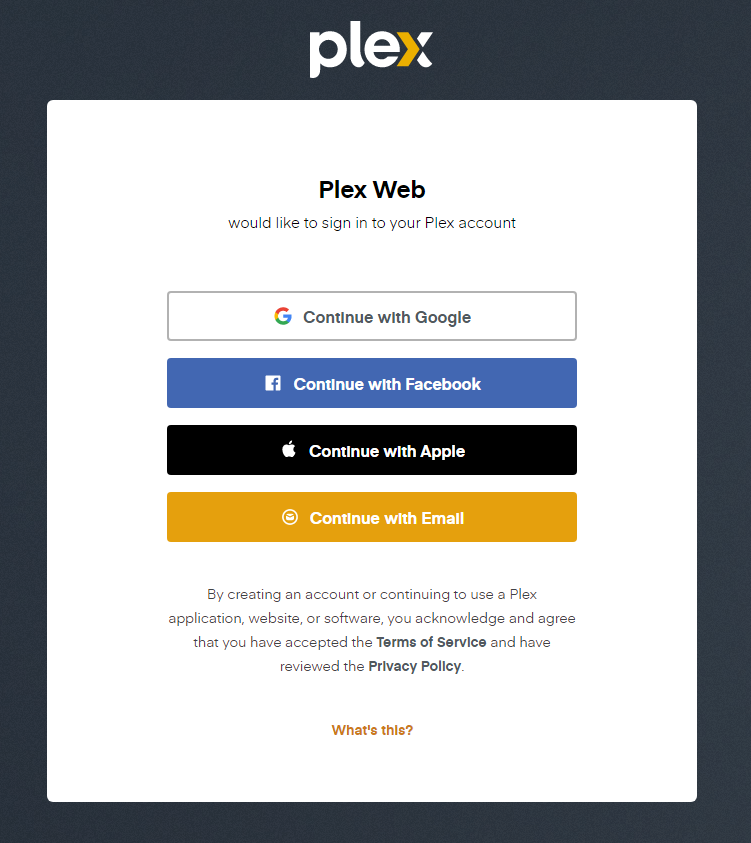
At this point, you will need to create an account with Plex. Alternatively, you can sign up with Google, Facebook or Apple accounts. I recommend having a local Plex account, but it’s up to you.
The next couple steps are pretty straight forward. Just navigate through them.
Once your server is fully set up, you will be able to access Plex from any web browser on your network:
http://serverip:32400/web
Once you have Plex remote access setup up, you can access your Plex server from:
https://app.plex.tv/
Keeping Plex Up To Date
The main benefit of installing your Plex Media Server with this method is allows very easy updating of your server.
To update your system, along with Plex, run this command from your server’s SSH terminal:
apt update && apt upgrade -y
Since you added the Plex repository to your system with this installation method, Plex will automatically update to the latest available version.
Adding Media To Your Plex Server
You have several options for adding your media to your Plex Media Server.
One of the easiest ways would be to add another drive to your Plex server and copy your media over to it. This is really easy with Proxmox!
To add a drive in Proxmox, shut down your server. Navigate to your container and select the Resources tab. With the Add button, add a new Mount Point.
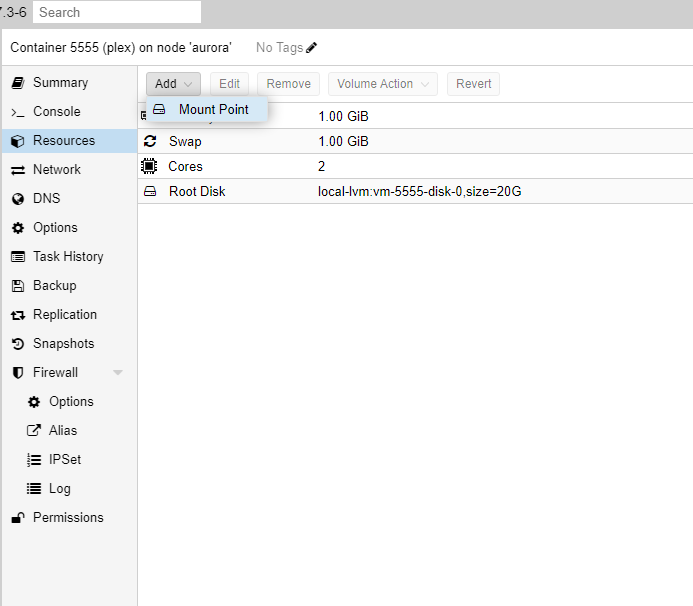
From here, you specify the hard drive in Proxmox you want to use, the size of the drive and also where you want that drive to be located in the file system. Here’s some examples from our system, for a 500GB drive:
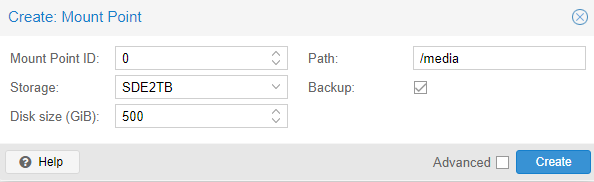
You can copy your media to this new mount point through SFTP, Rsync or other methods.
Alternatively, you can mount a drive using a NAS. This allows you to utilize your network attached storage and will allow your Plex server to natively access your media files!
Wrapping Up With Plex Media Server
Plex has been an excellent addition to our media systems and has completely supplanted subscription based services for us.
There’s a fair bit left to explore, such as establishing remote access, adding your libraries and other details. This is just the begging.
If you have any questions, comments or further thoughts, please leave them below!